A Special Day

Template coming soon!
Be True by Tracie Stroud Designs
Last Saturday I told you I was going to be doing a regular Saturday Adoption Update post. Well, today's post isn't really an update on our current adoption but it's a post about a special day we celebrate in our household that involves adoption and a birthday. 11 years ago we welcomed our first baby girl in our arms and exactly 10 years after that (to the day and almost the exact time!) we welcomed our youngest baby girl in our arms. September 16th is a special, special day in our house! I can't imagine my life without either of these girls. What an amazing 11 years it's been!

And it just so happens that today, September 28th, 2013, marks one year that we've been home with Lydia. I haven't had a chance to scrap a page about it yet but I know I will soon. It's been an amazing year. Our seemingly quiet, shy, timid 2 year old has turned into a spunky little 3 year old who LOVES to talk, play pretend, tell stories, read and sing. She never stops! Boy has she changed over the last year. The child I brought home is not the child she is today and you know what? I'm SOOOOO happy about that. She's developing her own personality, she's comfortable around us, she's found her place in our family....everything has been so good. Not to say there haven't been tough times but this past year has been such an awesome year of growing and learning for our whole family. I thank God every day for the blessing she is to our family.

Lookie there, I already have some journaling to go on my next digital scrapbook page. Next week you just might see a page with that exact journaling on it!

-Liz


My Pages - Monthly Re-cap

It's almost the end of the month, and it's time for my monthly digital scrapbook page re-cap. I don't know if you all enjoy these posts but I like writing them up and seeing what I've done over the last month or two. It helps me to reflect on my memories and why I scrap....and it usually makes me want to go scrap some more photos!

So, let me go ahead and begin. Since I've finished up Lydia's Album, I've been working on finishing up my 2012 photos. That is what you see here. All of these photos were from 2012.

That's a picture of my nephew marching in the July 4th parade with his cub scout troop.

Double Monthly Challenge Templates 9 by Scrapping with Liz
American Made by Bella Gypsy Designs


 And my oldest daughter's 10th birthday.
We just celebrated her 11th birthday last week. Time really does fly!

Templates from September MIS (available soon!)
Birthday Bash by Megan Turnidge Designs

Oh wait, the photos from above were just this summer (2013)! Guess I just loved the photos so much I didn't want to wait to scrap them.

September Challenge at Scrap Orchard (limited time freebie)
Sandy Toes by Dream Big Designs
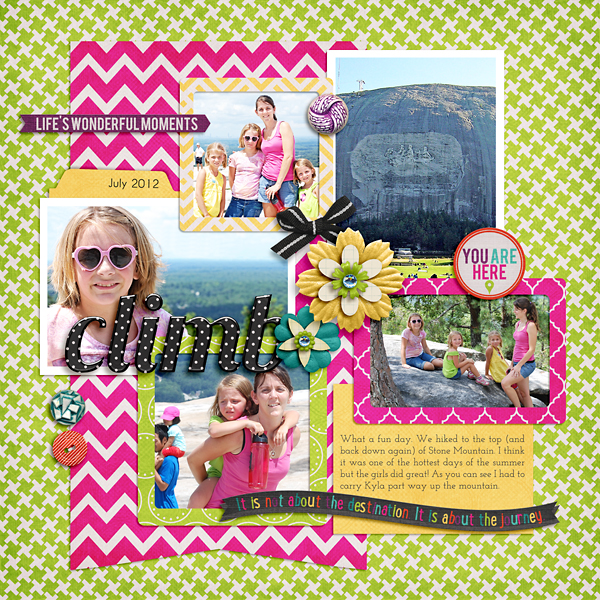
  Last year climbing Stone Mountain.

Double Monthly Challenge Templates 9 by Scrapping with Liz
You are Here by Bella Gypsy Designs


Double Monthly Challenge Templates 9 by Scrapping with Liz
In Real Life Day to Day Collection by Bella Gypsy Designs
A fun family day at Camp Living Water. 
Double Monthly Challenge Templates 9 by Scrapping with Liz
In Real Life Day to Day Collection by Bella Gypsy Designs
 And a cute picture of my two spunkiest kids.
September Blog Template by Scrapping with Liz on the SO Blog
Little Miss Sunshine by Megan Turnidge and Tickled Pink Studio
So there you have it! I've had fun scrapping photos from 2012. It brings back lots of memories.....
-Liz

Personal Announcement!

I have a little announcement to make and I'm going to make it with a digital scrapbook page:

Will be in a future template pack!
Mr. Little Man by Sugary Fancy Designs

Can you guess what it is? Here's the journaling on my page in case you can't read it on the re-sized version:

Emmie drew this picture a couple of months ago and handed it to me and told me she left room for another child....a boy!

We had been discussing adopting again so it was on everybody’s mind. In our minds, we had intended on waiting until Lydia was home a year, but after much prayer and consideration we ended up sending in our paperwork on July 15th, honestly thinking it would take another 19 months before we brought home another child.  We got a totally unexpected phone call on August 2nd from our agency telling us about you. We told them we would look at your file.....

After a weekend of praying & looking at your file over & over again (not to mention the adorable pictures & video), we sent in our Letter of Intent on  August 5th and got our Pre-approval to adopt you just two days later. Shortly after sending in the letter of intent we picked a name for you. We knew we wanted a Bible name & when I looked up the name Matthew & saw that it meant “Gift of God” we knew that would be your name. Now we are on the paper chase to update our home study & dossier. The time frame for us to come & get you is about 9 months.....9 very long months. 

Emmie quickly updated her drawing as soon as she knew she was going to have a little brother.

There it is.  We are adopting a boy! I can't share too many details about him now but I will as soon as I can.

You all have been a big part of us being able to adopt.  If it wasn't through my little digital scrapbook business I don't know where the funds to adopt would come from. You guys are amazing fans and supporters and I'm so appreciative of that. God has truly blessed us through you. Since you guys are a big part of this process I'm going to try to keep you posted on what's going on by trying to do a regular Saturday Adoption Update post. I've decided I should document the whole process (feelings, emotions, reasons, etc...) through digital scrapbook pages. I did make a whole album for Lydia from start to finish but I failed to capture all of the emotions that I felt during the process.....and I really want to do that this time around. So that's what I plan on sharing with you on Saturdays...not every Saturday but when I have a page to share about adoption that's when I'll share it. You know me....I've got to be all organized about it!

And thank you guys again!
-Liz

Double Page Layout Inspiration

Have you ever combined templates from two different template sets to make a double page layout? If you haven't yet you really should try it. Look at these pages my creative team made using two totally different templates. I just love how they made them work.


by Tiffany
Using Fancy Journaling Temps and Mix and Match Double Templates 2

by Tiffany
Using Mix and Match Double Templates 2 and Recyclables 14

by Tiffany
Using Up Close and Personal Temps and Double Album Templates 4

by Tiffany
Using Recyclables 12 and  Double Monthly Challenge Templates 1

by Tiffany
Using Recyclables 11

by Rebecca
Using Recyclables 20 and Simple Square Templates

by Rebecca
Using Ianthine Templates and Mixin' It Up Templates

by Donna
Using Recyclables 20 

And here's a couple of layouts I found in the gallery over at Scrap Orchard.
by Olivia
Using Recyclables 24 and Recyclables 22

by Jen
Using Background Starter Circle Templates and Keepin' It Real Templates  

Give it a try. Look through your stash of templates and see which ones might go well together. Or maybe pick out some photos and see how many photo spots you need and find two templates that would work for that. Really, the possibilities are endless!

-Liz

Photoshop Quick Tip - Who Knew?

A few months ago I was doing a live crop over at Scrap Orchard. I was digital scrapbooking, people were watching and chatting, it was a lot of fun. As I was dragging my elements and paper into Photoshop (I use CS3) someone mentioned Load Files into Stack. I was like, What's That? They said it was a script written into Photoshop to load in your files all onto one document instead of just having them floating all over your page. I had to give it a try. 

I was blown away. How come I never knew about this before? I've been using Photoshop for over 5 years! So, if you use Photoshop and didn't know about it (like me) here's a little tutorial to show you how to use it.

Just a note: Photoshop Elements works differently as you have a Photo Bin at the bottom of your screen where all of your elements and papers would go.


Go to File > Scripts > Load Files into Stack


A screen will pop up and you'll hit browse. You'll find your way to the digital scrapbook elements or papers that you want to use and select them. Hold down Ctrl while you select and you'll be able to select as many as you want. Then click on open.


You can see on the screen above all of the elements I have selected. (I'm selecting from Dream Big Designs Discover Space Kit). Then you'll hit OK.


Once you hit OK Photoshop will take over and load all of those files on to one document. You can see all of them to the left. The most amazing thing about this script is that it loads all your files with their names on the Layer Palette! The way I was doing it before it would rename the elements and just name them Layer 1, Layer 2, etc... Having named layers is so helpful when you are digital scrapbooking because you can easily identify different layers in case you want to move them, add layer styles, delete them, etc...

From this point, you can just drag and drop your elements right on to the page you are working on. So easy.

Maybe I was living in the dark ages and you all already know about this awesome tip but just in case you didn't.....

-Liz

Quick Photo Editing Tip in Photoshop

I learned a photo editing tip a long time ago. I don't even remember where I learned it. I think maybe I learned it from my hubby, who used to know more about Photoshop than me. That's right, I know more than him now. ;)

I usually try to use RadLab before I place my photo in a digital scrapbook template but sometimes I'm in a hurry, or sometimes, after I've placed papers and elements on the page, I find that the photo needs a little something more. That's when I hit Ctrl+M and this little window pops up:


I'm not going to pretend that I know what "curves" are....because I don't. All I know is that they easily help me adjust the brightness and contrast on my photos. If you want to know all the techie details I found this blog and it seems to explain it pretty well....although I will admit, it's a little over my head. I'm also using Photoshop CS3. Adjusting the curves in Elements will be a little different.

Once this screen pops up I'll use the mouse and click on that diagonal line. Usually, at this point, I just want to brighten up my photos and I'll go to the top part of the diagonal line and just move it a bit like this:


Each photo will be different but this is where I usually start. Make sure you have the Preview box checked and you should be able to see your photo as you are adjusting it. Once you have what you like just hit OK.

Here's a close up of the before and after of the photo I adjusted:


Looks pretty good for a quick photo edit, huh? Sometimes I also play around with the bottom of the curve if I need more contrast. Just play around with it and you'll be amazed at what it can do for your photos.

Here's a before and after of the digital scrapbook page I made.

The above page shows the bunch of pictures on the right unedited. After scrapping them with bright bold colors I felt like the photos needed to pop a little more. That's where adjusting the curves came in.

Template from September Template Challenge (just posted yesterday) and Life is Good by Bella Gypsy Designs

Hope this helps!
-Liz


© Scrapping with Liz
Maira Gall