
Hello all and happy Holy Week! CTM Robin here with another step-by-step blog post to show you how I did something a bit different with one of the templates in Liz’s Messy Mood Board 2. I hope you enjoy seeing my thought process while doing so.
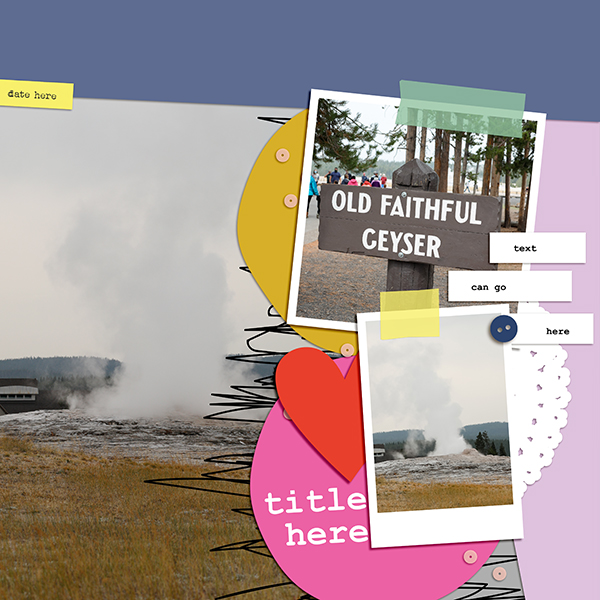
First, I chose this template:

I LOVE having a large photo on my travel pages, so I clipped this one to the background paper and two others in the smaller spots.

See how my photo isn't quite big enough? Well, I wasn’t worried about it not being big enough to cover the entire paper since the circles covered up where the photo fell short. It will be easy to clip a piece of paper to the background layer as well, and no one will be the wiser!
Now, if you notice, my photo of the geyser is a bit
dark. I simply used my CTRL J to
duplicate the photo and linked the two photos together, so if I moved one, the
other one would also move. Then I
changed the blend mode of the one on top to “overlay” so that it lightened up
the photo.
After completing this step, I then added all my papers from the Keep on Dreaming collection by NBK Design. See how I clipped an extra paper where that blank spot was? Again, the way this template is laid out with the two circles, it looks like I meant to do that 😊

Next, I added the elements and text:
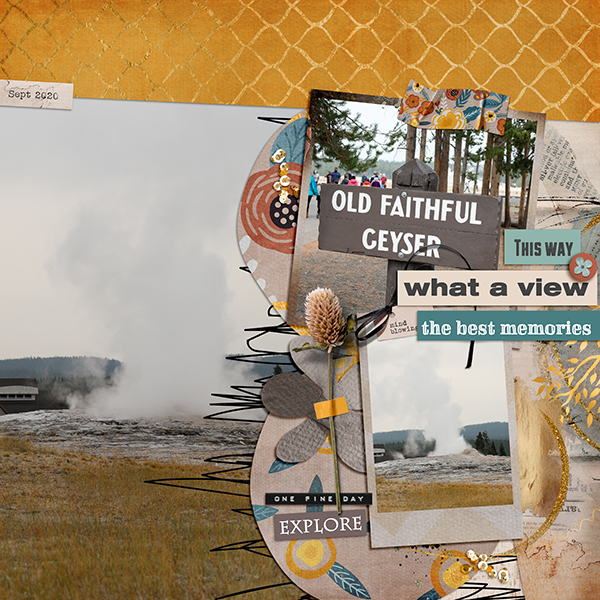
Once again, I just wanted to show you that you can manipulate these templates to fit your photos. Sometimes you just have to use some extra papers or frames or whatever you need. Don’t be afraid to try something a bit outside the box. You’ll have fun doing it!
Thanks for looking at my layout, and I’ll see you next month
with another step-by-step page.
No comments
Post a Comment