
I just released the next in my Remember Templates series that I'm designing and using for my weekly scrapping. Use these for single pages, double pages, weekly scrapping, daily scrapping, etc...   by Candy Lai  By Danica  By Donna  by Donna  By Hanna |
Remember Templates 5 & Pages
Week 16: Camping, Easter, and Some School

Remember Templates 4 by Scrapping with Liz
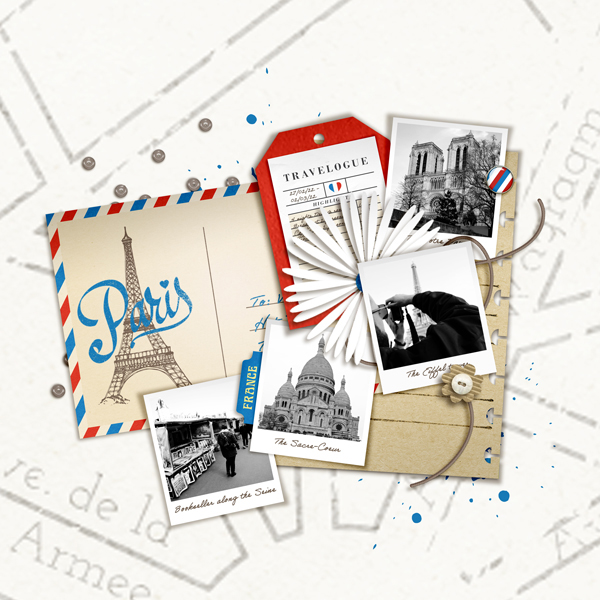
Caurulean:Botanical Mixed Media Paperie by Rachel Jefferies
Storyteller BYOC 2022 April Kit by Just Jamee Designs
Mixed Papers #2 by Paula Kesselring
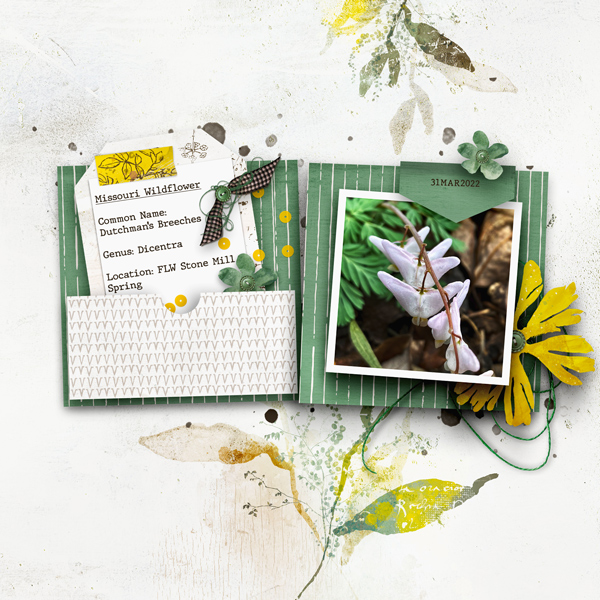
Storyteller BYOC 2022 April Kit by Just Jamee Designs
Mixed Papers #2 by Paula Kesselring
We took a little break this week and took our family camping. It meant too many photos to choose from. I had to add another photo strip to the template above. I might even have to make a whole camping album just for our 3-day camping trip! For now, these pages will have to tell the story.

Remember Templates 4 by Scrapping with Liz
Caurulean:Botanical Mixed Media Paperie by Rachel Jefferies
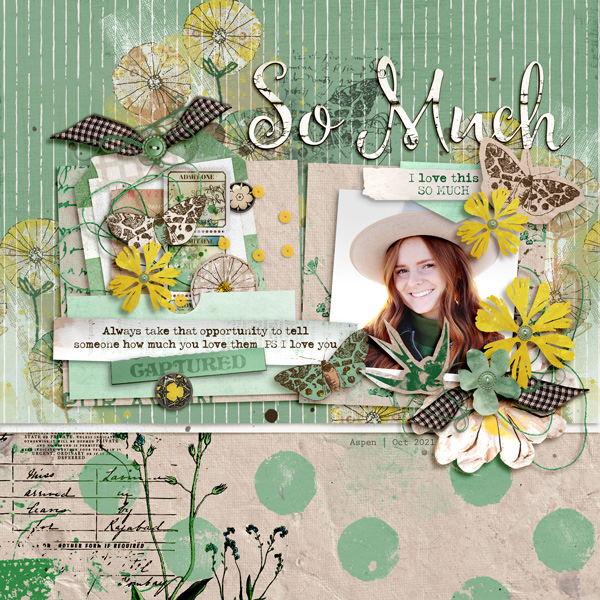
Storyteller BYOC 2022 April Kit by Just Jamee Designs
Mixed Papers #2 by Paula Kesselring
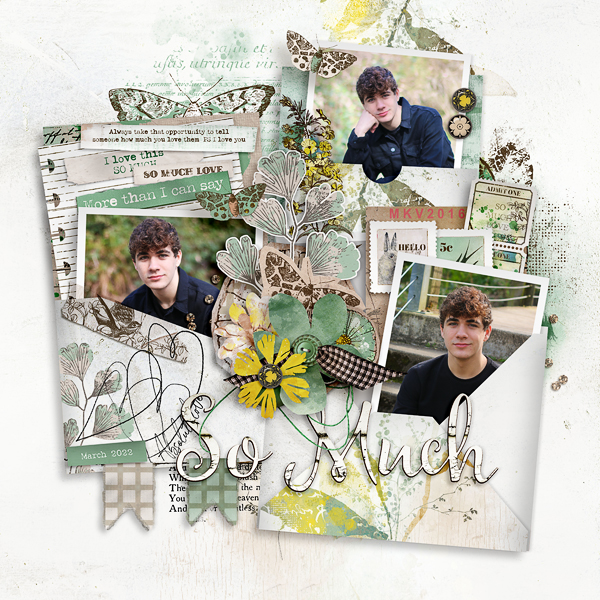
Storyteller BYOC 2022 April Kit by Just Jamee Designs
Mixed Papers #2 by Paula Kesselring
-Liz
Week 14 & 15: End of Year Events, Easter Break & More!

Remember Templates 4 by Scrapping with Liz
Caurulean:Botanical Mixed Media Paperie by Rachel Jefferies
Storyteller BYOC 2022 April Kit by Just Jamee Designs
Mixed Papers #2 by Paula Kesselring

Remember Templates 4 by Scrapping with Liz
Must Watch Foundations by Scrapping with Liz
Caurulean:Botanical Mixed Media Paperie by Rachel Jefferies
Storyteller BYOC 2022 April Kit by Just Jamee Designs
Mixed Papers #2 by Paula Kesselring
Caurulean:Botanical Mixed Media Paperie by Rachel Jefferies
Storyteller BYOC 2022 April Kit by Just Jamee Designs
Mixed Papers #2 by Paula Kesselring
I might have to make some individual photos for some of these events since there were so many memories captured that I want to remember, but these will have to be enough for now.

Remember Templates 4 by Scrapping with Liz
Must Watch Foundations by Scrapping with Liz
Caurulean:Botanical Mixed Media Paperie by Rachel Jeffries
Pocket Art: Collage Bits & Mixed Media Artistry 12 by Rachel Jefferies
Storyteller BYOC 2022 April Kit by Just Jamee Designs
April's BYOC Bundle by Paula Kesselring
Storyteller BYOC 2022 April Kit by Just Jamee Designs
April's BYOC Bundle by Paula Kesselring

Remember Templates 4 by Scrapping with Liz
Caurulean:Botanical Mixed Media Paperie by Rachel Jeffries
Pocket Art: Collage Bits & Mixed Media Artistry 12 by Rachel Jefferies
Storyteller BYOC 2022 April Kit by Just Jamee Designs
April's BYOC Bundle by Paula Kesselring
Storyteller BYOC 2022 April Kit by Just Jamee Designs
April's BYOC Bundle by Paula Kesselring
How are you at picking out photos for your pages? Do you want to scrap them all?
-Liz


Step-by-Step
Hello all and happy Holy Week! CTM Robin here with another step-by-step blog post to show you how I did something a bit different with one of the templates in Liz’s Messy Mood Board 2. I hope you enjoy seeing my thought process while doing so.
First, I chose this template:

I LOVE having a large photo on my travel pages, so I clipped this one to the background paper and two others in the smaller spots.

See how my photo isn't quite big enough? Well, I wasn’t worried about it not being big enough to cover the entire paper since the circles covered up where the photo fell short. It will be easy to clip a piece of paper to the background layer as well, and no one will be the wiser!
Now, if you notice, my photo of the geyser is a bit
dark. I simply used my CTRL J to
duplicate the photo and linked the two photos together, so if I moved one, the
other one would also move. Then I
changed the blend mode of the one on top to “overlay” so that it lightened up
the photo.
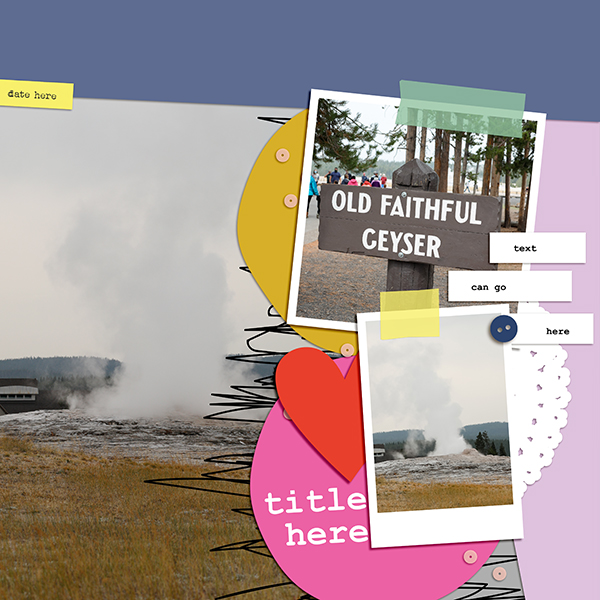
After completing this step, I then added all my papers from the Keep on Dreaming collection by NBK Design. See how I clipped an extra paper where that blank spot was? Again, the way this template is laid out with the two circles, it looks like I meant to do that 😊

Next, I added the elements and text:
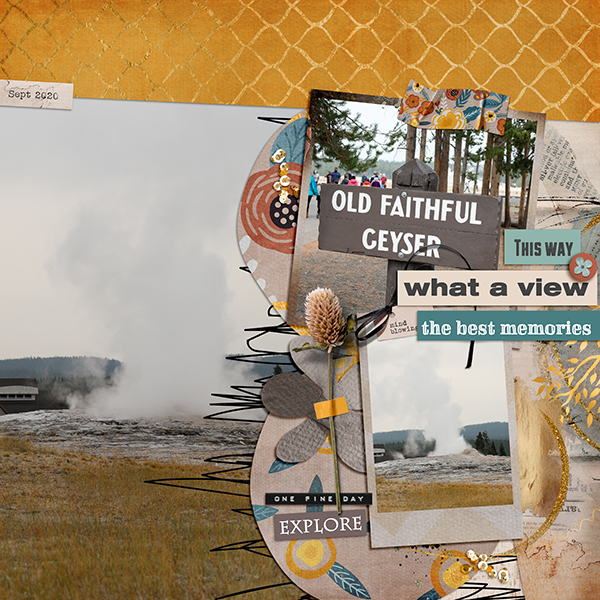
Once again, I just wanted to show you that you can manipulate these templates to fit your photos. Sometimes you just have to use some extra papers or frames or whatever you need. Don’t be afraid to try something a bit outside the box. You’ll have fun doing it!
Thanks for looking at my layout, and I’ll see you next month
with another step-by-step page.
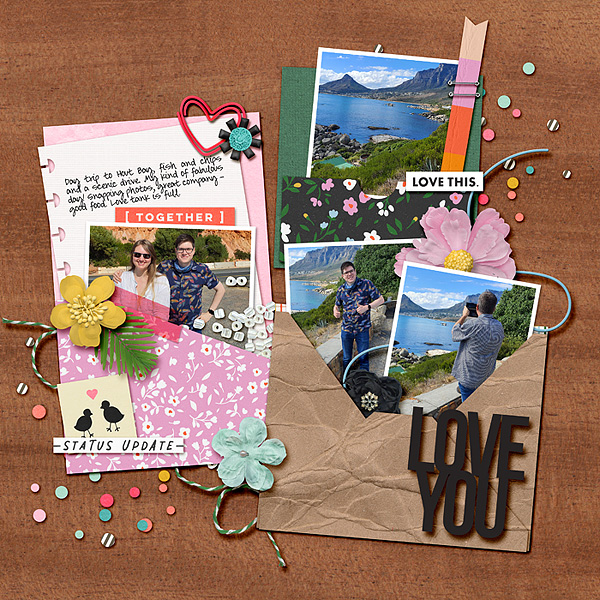
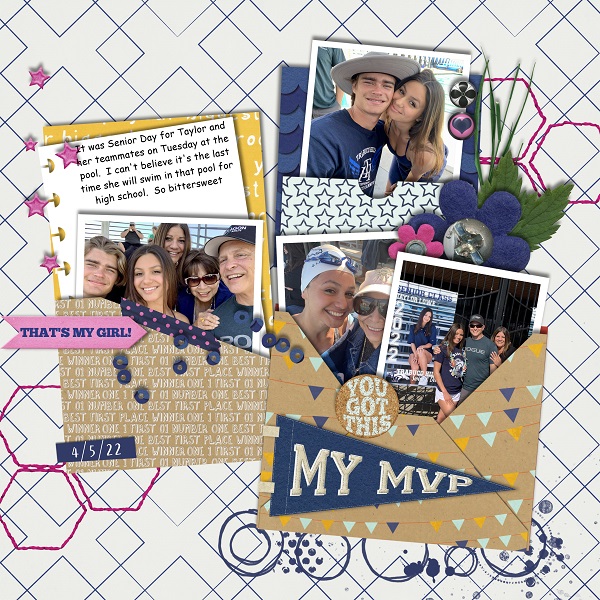
Fun with Envelopes Templates 3 & Must Watch Foundations
It's been a while, but I finally have a NEW set of Envelope Templates in the store. You can clip your own papers to the envelope layers to style your own envelope, and then layer those photos and elements on top or inside the envelopes. These are so much fun to play with, just check out the sample layouts below. I also designed Must Watch Foundations Templates. I needed some more QR code highlighters for my pages since I use them all the time, and so I created some new ones! I already used one on my weekly scrapbook page from last week! |


Creative Team Layouts
by Candy Lai

by Danica
by Donna
by Hanna
by Isa
by Kayla
by Sherri
by Stefani

by Tracy
by Trish
Week 12 & 13!
I was just a couple of weeks behind, but I got caught up this weekend. Here are weeks 12 and 13. We celebrated a 13th birthday along with some normal weekly activities.

Remember Templates 3 by Scrapping with Liz
Must Watch Journal Card Templates by Scrapping with Liz
Storyteller BYOC 2022 March Papers by Just Jamiee
Storyteller BYOC 2022 March Elements by Just Jamiee
Just the Basics Core Elements by Mommyish
Just the Basics Patterned Papers by Mommyish
Just the Basics Patterned Papers by Mommyish
A Spring Day Brushes by Paula Kesselring
I love that my daughter texts me pictures, and sometimes I even remember to include them on my pages.

Remember Templates 3 by Scrapping with Liz
Storyteller BYOC 2022 March Papers by Just Jamiee
Storyteller BYOC 2022 March Elements by Just Jamiee
Just the Basics Core Elements by Mommyish
Just the Basics Patterned Papers by Mommyish
Just the Basics Patterned Papers by Mommyish
A Spring Day Brushes by Paula Kesselring
Here's Week 13. We wrapped up our final week at our homeschool group, and it turns out most of the pictures from this page are from our homeschool activities. It's been a year worth remembering for sure.
Also, if you look closely, you might see a little sneak peek of something NEW that will be in the store on Friday. It has something to do with a QR code.

Remember Templates 4 by Scrapping with Liz
Storyteller BYOC 2022 March Papers by Just Jamiee
Storyteller BYOC 2022 March Elements by Just Jamiee
Just the Basics Core Elements by Mommyish
Just the Basics Patterned Papers by Mommyish
Just the Basics Patterned Papers by Mommyish
A Spring Day Brushes by Paula Kesselring
A Spring Day Papers by Paula Kesselring
That's it for now.
-Liz
Subscribe to:
Posts (Atom)