Digital Scrapbook Shadow Techniques


I've had a few people ask me how I get realistic shadows on my digital scrapbook pages. I'm always surprised by this since I feel like my shadowing can always use more work. I'm constantly trying new things and adjusting what I do, never feeling that I'm quite there. But since you guys asked I'm answering.

Since there are so many great shadow tutorials out there I thought, instead of writing my own tutorial, I would just share the different tutorials I've read that have helped me. I'll also share with you some of the shadow styles I use, and I even made my own little set of FREEBIE shadow styles. They are the same styles I use on my templates.

Let's begin. The very first tutorial I ever read on shadowing was over at One Little Bird. She has a great tutorial (Shadowing - The Basics,) showing you the basic settings you should use for your shadows, and then she goes into more details on how to customize the shadows by putting the shadow on a different layer.

The very first set of shadow styles I ever downloaded was from Megan Turnidge. She has a free set (now unavailable) on her blog along with a little tutorial. That's where I learned to warp those shadows, probably one of the quickest, easiest ways to customize your shadows.

Chelle's Creations also has some great tutorials that I've read. Here's a great summary of some different shadowing techniques. You can also purchase Chelle's shadow styles here. (now unavailable)

I just read this tutorial about using the wave filter on paper layers and I'm definitely going to be trying it soon. It looks like such a simple way to get a realistic shadow on paper layers and even some elements.

For those of you who use Photoshop Elements and can't put your shadow on its own layer (which most of these tutorials require) make sure you check out this video tutorial from Fiddle-Dee-Dee Designs.

And here are some free shadow styles. These are what I usually use on my templates. They are just a start though, try some of the techniques above.


If you have any favorite shadowing techniques please share them in the comments. I'm always looking for ways to better my shadowing.

-Liz

The Next Batch of Pages

Summer Rewind Templates by Scrapping with Liz
Star Quality by Down This Road Designs
CU Epoxy Styles by Chelle's Creations


I've been setting aside the weekends just for scrapping: no template work, no admin work, just scrapping. Don't worry! I still take care of my family and spend a lot of time with them, but when I have time at the computer it's strictly for scrapping. I've really been enjoying my weekends a lot more. I was able to scrap these next 5 pages in Matthew's Album, my 2015 weekly page, my 2015 title page, and I even got my next 5 pages started for Matthew's Album!

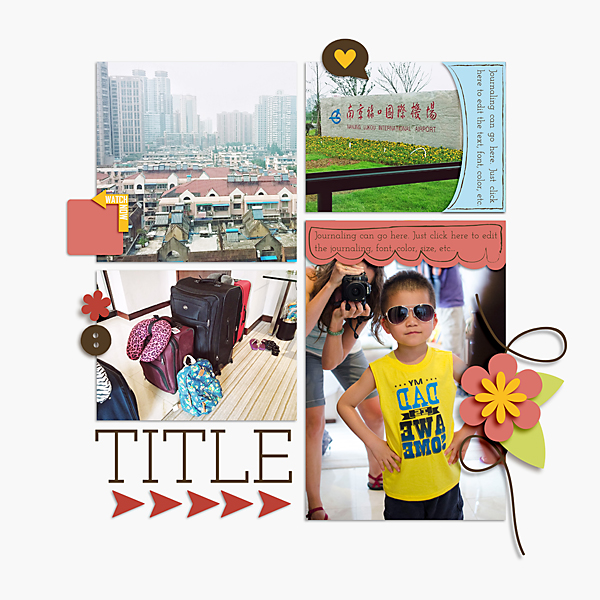
Now to the next batch of pages in Matthew's Album. These first two were pictures I took around the 'island' we stayed on. It was a very beautiful place.

Lots of Blocks Templates by Scrapping with Liz
Korean Wave by Hat of Bunny
More Spice Than Sugar Alphas by Bella Gypsy


These next two were difficult to scrap. I didn't really know how to scrap them. So I mainly let the pictures and video speak for themselves, and I added a little bit of journaling. I'd like to think I knew what was going on in Matthew's head, but I don't. Hopefully one day he'll be able to look at these pages and tell me what he thought. I think I might journal a page about what was going on in my head.

Remember That Templates 4 by Scrapping with Liz
Que Sera by Juno Designs

Remember That Templates 4 by Scrapping with Liz
Que Sera by Juno Designs

Heading back to Nanjing after a draining day.
Summer Rewind Templates by Scrapping with Liz
All Aboard by Kristin Aagard
Must Watch Templates by Scrapping with Liz


Here is the next batch of pages I started. Have you noticed I gave up using my Double Monthly Challenge Templates? I needed a little change. I think all these pages will still flow in his album. I just needed a little boost to make my scrapping exciting and creative again. Changing it up definitely helped.

Anyway, these next few just have edited pictures in place. I almost like how they look with just a plain white background....but I have so many pretty digital pages in my stash that I want to use!
Triangles, Triangles, Triangles Templates by Scrapping with Liz


Journal That Templates by Scrapping with Liz

 Time to say goodbye to Nanjing.

Journal That Templates by Scrapping with Liz

Being delayed in a foreign airport for over 5 hours calls for a 2-page spread, especially when they serve you shrimp. Did I mention it was hot, stinky, and packed?
Photos and Chevrons Templates by Scrapping with Liz

Photos and Chevrons Templates by Scrapping with Liz

And I had fun scrapping this cover page for my 2015 Album. I hope I still like it when it comes time to print my book at the end of the year.
Title Templates by Scrapping with Liz
Everyday Life January Kit by Juno Designs

Make sure to come back next week to see the finished pages.
-Liz


2015 Week 5: Popcorn, Hot Chocolate and Chess

My Life Templates 2 by Scrapping with Liz
Snap Happier 2015 by Bella Gypsy

Ugh, just now I realized I put 2014 on my page. I promise I'll fix it on my printed page, but I'm too lazy to go back and fix it on these web images. Just imagine 2015 right there next to February 1-7. Who else doesn't realize their typos until they upload? By the way, I can't believe it's February already. What's up with that? I keep thinking it's still January.

Well, regardless of whether it's January or February I have my week 5 page done.

Look at those kids. I just love 'em and all the fun things they add to my life.


I know I journaled it on the page, but I'm going to say it again. I love those little eyelashes!


How are you doing with your 2015 scrapping?
-Liz

Bleed, Guides & Printing: What's it all about?


Rebecca asked me a question about guides, bleed, and printing on My 2014 Layflat Shutterfly Album Post. I went to answer her question, and after realizing the answer was practically as long as a blog post, and I wanted to include some images for her, I thought I should just write a blog post about bleed, guides, and printing in case any of you have the same questions. Plus, I'm a nerd, and I like putting together images and comparing the different aspects of printing. Like when she asked the question:

        When I add my layout to Shutterfly, is Shutterfly showing me exactly how my page will look when printed (meaning the bleed/cropping has already occurred)? 

I was curious, and I really wanted to know how my finished digital scrapbook paged looked like compared to uploading it to the Shutterfly website and then finally what it look like printed.

So here are some images for you all. The above image shows what the image looks like with the guides in photoshop. The below images is the above image next to the printed page. You can see where the guides are and what got cropped off in printing. *ahem* I did not use guides on this page to double-check it. If I would have I probably would have made that flower and leaf a little smaller and moved it over a bit. Use your guides, people!


Here's a close-up of the printed page.


And finally here is what Shutterfly shows when I upload it. You can see that it shows the crop, although not exactly with what got printed.


To get technical this is how Wikipedia describes Bleed:

Bleed is a printing term that refers to printing that goes beyond the edge of the sheet before trimming. In other words, the bleed is the area to be trimmed off. The bleed is the part on the side of a document that gives the printer a small amount of space to account for movement of the paper, and design inconsistencies. Artwork and background colors can extend into the bleed area. After trimming, the bleed ensures that no unprinted edges occur in the final trimmed document.
It is very difficult to print exactly to the edge of a sheet of paper/card so, to achieve this, it is necessary to print a slightly larger area than is needed and then trim the paper/card down to the required finished size. Images, background images and fills which are intended to extend to the edge of the page must be extended beyond the trim line to give a bleed.
So, Rebecca, to answer your last two questions:
If I want a picture to be at the edge of my layout, how do I know where the edge will actually be? If I am using your guides, is it certain that when I put a photo right up to the guide that that will be the very edge of my layout in the layflat book?
Unfortunately, there is no way to make sure to line it up exactly. You can get close, but there's no exact science. The guides will help you get close, but there's no guarantee.

I sure hope this helps!
-Liz

2015 Week 4!

My Life Templates 1 by Scrapping with Liz
Snap Happier January 2015 Collection by Bella Gypsy
Life's Little Moments January Daters by Hat of  Bunny
Daily Life Journal Card FREEBIE 45 by Scrapping with Liz

This is our life, people. As I look at my pictures I realize that we spend a lot of time at home: learning, playing, loving. Oh yeah, and don't forget the cooking, cleaning, and laundry. Maybe next week I'll take more pictures of that. This is pretty much a typical week at our house. Do you ever get tired of my same ol' pictures? Sometimes I feel like I just take pictures of us doing the same ol' thing but this is what we do, and frankly, I love it.

I feel a little sad that I don't have any pictures of my oldest. She's 12 and she's not too fond of pictures unless she's holding a baby. Maybe I just need to borrow the neighbor's baby more often. I'm going to try harder next week to get more photos of her.

Take a closer look below if you want to.


As you can see it's easy to take pictures of my 4-year-old and her cute little ponytail while she stirs that waffle batter so intently.


-Liz
© Scrapping with Liz
Maira Gall