Custom Text Technique for Photoshop Elements

Hi! It's Tiff here. Last year I got a new computer, and I was sad to realize that my trusty old copy of Photoshop CS4 would not work anymore. I needed to "upgrade" Photoshop CC or "downgrade" to Photoshop Elements. I chose Photoshop Elements.

It has been difficult adjusting to a limited range of features. One I miss the most is the Pen Tool. I used it a lot for text boxes when I wanted to fill text all through the irregular areas in my page. But I recently discovered a work-around in PSE 15.

Here is my tip in a nutshell: You can use the Custom Shape Tool to place and overlap multiple shapes. Then you can merge them all together into one complicated shape! When you switch over to the Horizontal Type Tool, you can fill the shape with your text.

Now I'll step you through with screenshots. I'm using Artsy Journal Templates 14, and instead of using the text box that came in the template, I'm making my own because I filled much of the original space with extra photos.

Here I have placed three green rectangle shapes, and I've angled them so that they match the shape of the pink vellum layer. I made them different shades so that you could see they are separate shapes.

I select all three layers at once, and I right-click with my mouse to Merge Shapes.

Here is the result: the three simple shapes have become one complicated shape:

If you wanted your text to be exactly horizontal, you would switch to the Horizontal Type Tool now, and click inside your shape and start typing. When you move your mouse into the middle, the cursor will turn to an I-beam with circle.

I wanted my text to be tilted, so I took an extra step. I rotated the shape so that the edge along the title word "Art" was horizontal. I paid attention to the exact angle of rotation, so that I could exactly rotate it back later.

Now, I switched to the Horizontal Type Tool, clicked inside the shape, and I typed my text. In the inset, you can see that the Shape and the Type layers are separate. You can hide or delete the Shape layer after you have the Type layer established.

Unfortunately, I didn't take any more screen shots after this, but all you have to do at this point is rotate your text box backward by the same number, and you've got a custom shape, angled text box.  Here is my finished page. I used kits from the October 2015 BYOC at The Lilypad.

If you are an Elements user and have been looking for some techniques to take your journaling to the next step, I hope this gives you something that is simple with big impact. It would probably be cumbersome if you had an extremely irregular shape you wanted to build. But if your text space can be build up with just a few different shapes, then this might be a good technique to have up your sleeve. Have fun journaling!

Week 5: Spelling Bee, IE, Friends & Calendar Page

My Life Templates 2 - 2017 by Scrapping with Liz
Counting the Weeks Volume 1 by Amber Labau
Using February BYOC Products:
All Things Considered Papers by One Little Bird
All Things Considered Elements by One Little Bird
Puppy Love Papers by Pink Reptile Designs
Love is All Around Papers by Lynn Grieveson
Loves is All Around Elements by Lynn Grieveson
New Chapter Pocket Cards by Sabrina's Creations
Week 5 included our annual spelling bee, my oldest daughter's Individual Event, time with friends, time at home, school, etc... I took so many videos this week that I had 4 QR codes, and that didn't even include all the videos. I usually try to combine little clips, but there were so many different events that they didn't seem to fit together.


Can I say that I was super proud of my kids this week for getting up on stage (and my littles for sitting still!). My oldest with her 3 minute memorized speech, and four others for participating in our local spelling bee. I was especially proud of Matthew. Since he's only been hearing for two years he has to work extra hard at reading, spelling and writing. Plus speaking in public is something he is apprehensive about (understandably), but he got up there, he spelled words clearly and correctly, and made it through several rounds.


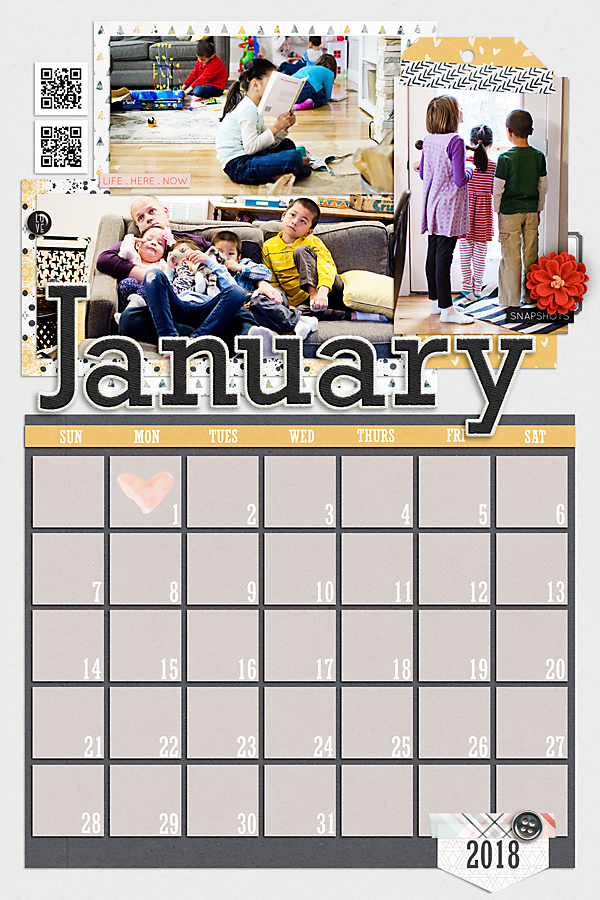
I loved the 12x18 Calendar that I created for my mom for 2016 that I'm doing it again for 2018. Just like the last couple of years I'll release a set of calendar templates so that you can make your calendar pages throughout the year and be all ready to print come December. I've already got January's in the store and February's will be there soon.

Here's my January page.

2018 January Templates by Scrapping with Liz
January 2017 BYOC Products available at The Lilypad

3 Template Packs - 50% TODAY ONLY!

Today I some oldies that are 50% off for the Something Old, Something New sale. There is a bit of variety here, so I hope everyone can find something they like at a great deal. Enjoy the 50% SOSN discount on these products today only, February 8, 2017.

12 Month Templates contains two double page spreads for scrapping a yearly review. I could also see these used for scrapping school photos, or for a photography project, or even for a day-in-the-life type page, with a photo for every hour.


That's My Plan Templates has some fun options for daily or weekly schedules.


And Frame Template Starters are templates with layered page border frames. You can scrap a large photo in the center, or use as a background to build upon.


I used That's My Plan Templates to document some our adoption timelines.


Katya scrapped photos her daughter each month with 12 Month Templates.


Christine scrapped some fun word art with Frame Templates Starters.

Monthly Blog Challenge - MBC February '17


Just the other day, I told Liz that January is one of those months that completely gets away from me.  We are post holidays, but the kids go back to school, then I go back to school.  Just as soon as I'm back, we celebrate birthdays and then it's the end of the month and I feel like I didn't accomplish a thing.  I did...but that isn't how it feels.  When my reminder showed up this afternoon to write the blog post I had that feeling of dang! January is gone...again!

I know you didn't pop in to read about my lost sense of time in the month of January.  You came to see what sort of yumminess Liz created for your February blog challenge.  So, here it is....

DOWNLOAD HERE


BY KATYA
BY AMANDA
credits: Elements: Amy Wolff ~ Delightfully Devoted | Papers: Amy Wolff ~ Delightfully Distressed | "Family" Alpha: Amy Wolff ~ Itsy Bitsy 7 | "Time" Alpha: Lynn Grieveson ~ Hester Alpha | Black button & stitches: Amy Wolff ~ Urban Fusion | Font: Josefin Slab.

BY DONNA
credits:  Blossom Festival, Junie, and Love Me Do all by Lynn Grieveson

Fun, right?!  I love the interlocking hearts.  I'm looking forward to seeing what you choose to scrap about with this one.

  • Here's how to play along with our February challenge...
  • Download the template
  • Scrap it!  Digi, hybrid or paper - whatever works for you is A.O.K. with us.  
  • Upload the completed layout or an image of it to any image hosting site.  The choice is yours. 
  • Send a link of your image no later than February 28th to our blog challenge email:  ScrappingWithLizBlogChallenge@gmail.com
    • Be sure to include February 2017 on the subject line.  
  • One winning layout is selected each month. 
  • All prizes are distributed via email and in reply to the submitting email. 
  • Prizes expire within the month so please be sure to use them before they're gone!


Happy Scrapping!
Kimberley (greenmother)

2/12/17 UPDATE:   I neglected to announce our January winner.  Congratulations, Jill!  
All coupons were sent via email on 2/8/17.    
{kp}

Monday's Highlight: LOVE the Sea by Laurie

Kit: Lets Fly Away by Little Butterfly Wings athttps://the-lilypad.com/store/Let-s-fly-away-kit.htmlSolid Papers: Wild(Nov. 2016 BYOC) by Allison Pennington at https://the-lilypad.com/store/Wild-Patterns-and-Backgrounds.htmlPage Template: Said With Love Template by Scrapping With Liz at http://the-lilypad.com/store/Said-with-Love-Digital-Scrapbook-Templates.htmlFonts: Mr. Sheffield(Title) and Journal and Quirked(Journaling)

Today's Monday Highlight is brought to you by Laurie. I saw this in my facebook group gallery and loved the simplicity and gorgeous photo. I love the paper she chose to use for the letter V. It gives a feel of the ocean and helps the page to stand out. The little bits of orange also make the page pop. The dark blue paper framing the page really adds to the elegance of the page too.

I hope this Monday's Highlight will give you some inspiration for scrapbooking those special moments this week.

-Liz
© Scrapping with Liz
Maira Gall